Friday, December 12, 2008

Match the Snowmen card game - SASI


I finally had a chance to get creative and ink up some images from a new stamp set I bought recently. It is the Home Sweet Home set by Taylored Expressions. The images are so cute and fun to color so I decided to create a project other than a card. I thought it would be fun to create little cards for a memory game I call Match the Snowmen. I inked up the snowman image 10 times and colored them in pairs. I cut one sheet of card stock into ATC size cards for the base. I sponged the sky and stamped the snowflakes and sentiment also from this set. I then cut out each snowman and adhered to the front of the card. On the back side I adhered red paper where I also stamped the snowman image again.

Here are various views of the cards.

Monday, November 17, 2008

Camera vs Scanner


I made this card last week and was ready to take a picture of it but my camera batteries needed recharging. I was a little bummed but then remembered that I could use my printer to scan a shot of it. Well, it wasn't the greatest scan but it was better than not having a picture. By morning the camera batteries were charged so I took a quick snap shot of the card before mailing it. Well I must say; I do like taking pictures but I really need to get better at it especially with the lighting and I also need to read how to use the photo editing software I have on my computer. The scanned card is the one on the bottom. I've read some people use a photo box and maybe that will help me produce better pictures. There is a thread at Splitcoast on how to make a homemade photo box and I think it is time I stop procrastinating and make one. I'll have to do that and then post my results.

Monday, November 10, 2008

bookmarks


Here are two bookmarks I made over the last two months. On the flower bookmark, I used the double daisies from the Flowers for Daisy set. I tried the crayon resist technique for the first time (not bad for my first time, lol) and then I sponged on the various colors of ink. On the second one I used some stamps from the dollar bin; stamped the ghost, cut it out and adhered to the green paper that I trimmed with the Martha Stewart zig zag edge punch for some added decorative detail that I thought fit into the Halloween theme. I stamped the tree directly onto the paper and the moon was cut using a circle punch.

Sunday, October 5, 2008

Gina K. Designs October Challenges


Here are cards I made for the Gina K. Designs October release party challenges.

For challenge 1, I used the double daisies and a sentiment from the Flowers for Daisy set. Patterned paper is My Mind's Eye, card base is Stampin Up and ribbon is American Crafts.

For challenge 2, I used a sentiment from the Flowers for Daisy set and the other images are from the Little Tee's set. Patterned paper is My Mind's Eye, the green and pink card stock are Stampin Up and the sheer ribbon is Michaels. I added Star Dust Stickles on all four pink ribbon images and also around the border of the sentiment. I also added a bit of chalk around the tee image and also around the sentiment.

Friday, October 3, 2008

Paint Chips


In celebration of World Card Making Day, Angela put out a challenge to make a card using paint chips.

I used my Sizzix die to cut the leaves and the Cuttlebug tiny tag for the sentiment tag, a rub-on for the center and My Mind's Eye paper.

Here's my card:

Tuesday, September 30, 2008

OCC case challenge


A midweek challenge put out by OCC was to case a card from one of the design team member's gallery. I cased this card by Laurie.

Here is my card:

All paper is by My Mind's Eye. The flower image is by Inkadinkado. I stamped and colored it with Mary LePlume markers several weeks ago and glad to finally put it to use. I cut it out with scissors and an X-acto knife and adhered it to the card front. I used my Craft Lite cutter to cut the decorative edge on the sentiment tag and also on the two papers layered on the left. The brads are by Making Memories. Sentiment is by Studio G.

Monday, September 29, 2008

Taylored Expression's Cupcake Challenge-TECC35


I finally got a chance to participate in one of Taylor's cupcake challenges. Here is the card I made for cupcake challenge #35.

Paper: My Mind's Eye
Sentiment: Me & My Big Ideas
Cupcake: Outlines Rubber Stamp Co.
Ribbon: American Crafts
Ink: Nicole Crafts and Marvy LePlume Markers

Thursday, September 25, 2008

National Alzheimer's Day


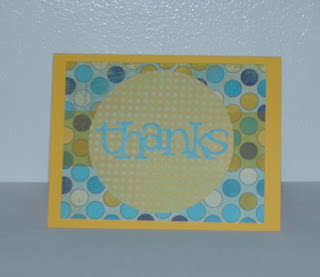
Here is the card (interior and exterior views) I made in honor of National Alzheimer's Day. I will send this to the Artman Home Staff. More information can be found in my previous post titled Cammie's Heart to Heart Blog Candy.

Supplies/Tools:
Card stock - Stampin Up
Paper: My Mind's Eye
Vellum: from my stash
zig marker
Fiskars circle and square templates
Cuttlebug die cut word "Thanks" from the Olivia font set

Edited to add: Oops, this should say World Alzheimer's Day.

What's Cook'n with Kitchen Sink Stamps


I created this card for the September contest at Kitchen Sink Stamps.
This is my submission for the Best Use of Sentiments category.

I used a sentiment from the 3 step Get Well Teddy stamp set.
Supplies/Tools:
Paper: My Mind's Eye
Vellum: from my stash
Tag: Cuttlebug tiny tag die cut
Provocraft: decorative edge scissors
EK Success: corner rounder
Ink: Brilliance graphite black

Sunday, September 21, 2008

Cammie's Heart to Heart Blog Candy

Earlier this month, Gina K. Designs released a new stamp set designed by Carolyn King (aka Cammie) named Whimsical Autumn. Cammie's grandmother recently passed from Alzheimer's disease and Cammie wants all proceeds from this stamp set given to the Alzheimer's Association in honor of her grandmother. (She made her first contribution from the sales a few days ago!!!) In addition, because today is World Alzheimer's Day, Cammie would like for those that can participate to recognize those caregivers that help those with this terrible disease. Send a card and you can enter for a chance to win the largest blog candy that I've ever seen!! Numerous companies and individuals contributed some fantastic gifts for Cammie's blog candy giveaway!! Check Cammie's blog post for more details.

Thursday, September 18, 2008

Born to Shop


I finally got a chance to make a card using the Little Tee's set from Gina K. Designs. This fun set was designed by Melanie Muenchinger. I paper pieced one of the tee images on 3 designs of Marcella K shimmery paper. I stamped the hanger several times and used my Xacto knife to cut them out. I cut a piece of wire and wrapped the ends around the brads before inserting into the card base to make the hanging rack. I then added some price tags to go with the theme of the card by poking a hole on one side of each tee and inserting a piece of DMC thread into the hole which I taped to the back of the tees. I then attached a piece of card stock to the other end of the thread for the tag. I hand wrote the prices and also the dollar sign on the title with a marker.

Tuesday, September 9, 2008

With Sympathy


Card stock: American Traditions; Papertrey Ink vintage cream
Stamps: Papertrey Ink's Mixed Messages; Northwoods' Tulip Vase with Tag
I stamped the tulips on the vintage cream card stock and colored with with Marvy LePlumme markers and Sharpie markers. I stamped the sentiment using Palette dark chocolate ink. I cut out the image and adhered on top a piece of vintage cream card stock, then adhered to a piece of My Mind's Eye paper and then adhered those to the card base.

Sunday, September 7, 2008

GinaK's September sketch challenge


Each month Gina K. Designs has a release party featuring the new stamp sets for the month. Here is a sketch challenge posted by Cammie.

This is the card I made based on this sketch. I used American Traditions card stock for my card base. This card stock is similar to DCWV as it is textured on both sides. I was excited to find it because I was having trouble finding a color that I liked for my base. I would have found them sooner but these were stuffed in the file with some Xmas paper pads, oops; (note to self: when organizing make sure to look through all files even though I may think I have everything in the appropriate place, but it was fun to find something that I had forgotten about kinda like a surprise gift, lol; has that ever happened to you?) Anyway, for this card I used a Gina K. Designs stamp set designed by Asela Hopkins called Flowers for Daisy. I stamped the leaf image in gold on the 12x12 sheet and then cut it in half to make the base. For the ovals, I used my Fiskars oval template to cut the shapes. I stamped and embossed the Psalms verse on Papertrey Ink's vintage cream card stock. I also used some of this card stock for the corner piece of the card. I then stamped the leaf image on Provo Craft's green paper using Versamark ink and then embossing it with clear embossing powder. To complete the look of the card, I inked up all the edges of each piece including the card base with gold ink before assembling.

Saturday, August 30, 2008

My first ATCs


ATC? What is that? It stands for Artist Trading Card. These are mini works of art which are always made in a standard size of 3 1/2" x 2 1/2". More info can be seen here. I have never been inspired to make any until one of the crafts groups that I belong to decided to have a swap. What drew me in to even try was that they were going to put the participants in groups by skill level; e.g., newbie, advanced, etc. (The participants informed the swap hostess which group they should be put in) Well I joined the newbie group of course which made it less intimidating for me as I felt no one should be disappointed with my creation (I hope not, lol.) and I only had to make 5! (I know, the picture only shows 4 but thank goodness I read through my guidelines before mailing so the fifth one was added, oops.) I decided to make them all the same for my first time. Anyway, I cut my card stock to the appropriate size and then I centered a brass stencil over each card to make the embossed oval. I outlined the oval with a black Marvy LePlumme II marker and I sponged yellow chalk on the interior of the oval as a backdrop for the image. The flower image is from this set . I stamped the flower several times and colored each one using more of my Marvy LePlumme markers. I cut out each flower and added stickles to the centers and petals. I adhered the flowers with dimensionals, added brads and finished by rounding the corners of the card stock.

Tuesday, August 19, 2008

My 2 firsts


I finally did it! I made a post-it-note holder and I used my bind-it-all! One of my coworkers got a new job and last Friday was her last day with us and I wanted to give her a little something. Well this gave me the motivation to make a post-it-note holder with matching RSVP pen. Instead of using only card stock as a base, I used a combination of chipboard and card stock. I cut two pieces of chipboard (left over from a large sheet I purchased several months ago) for my front and back covers. I used two coordinating papers from Inque Boutique's Cabana collection. One for the front and back covers and the other for the interior front and back covers. I used my bind-it-all to bound the covers together. I've had my bind-it-all for a few months now so I'm glad I finally used it because I had been intimidated but it turned out to be very easy to use. I even stopped in the middle of making these to watch a video I found on You Tube for an extra bit of motivation. To finish off the holder, I die cut a monogram for the front cover. To adhere the post-it-note holder, I used red liner tape. For the pen, I went the easy route and just filled it with a piece of the paper I used for the chipboard cover. Finally, I added some ribbon to the pen and on the binder coils. I didn't have enough time to make a beaded pen but I'll be trying that soon. I think these turned out lovely for my first time at making them.

Sunday, August 17, 2008

Papertrey Ink August GSS


Last week I submitted these two projects for Papertrey Ink's August Guest Star Stamper contest. I made this card using the Bitty Baby Blessings stamp set. The "Ahoy little sailor" sentiment reminded me of a little suit that my son had as a baby which gave me the idea to make this cute little outfit. I hand cut my own pattern using K & Company denim paper and Nicole Crafts card stock. I used Marvy LePlume markers and Prismacolor pencils to color in the little boats and to make the faux stitching.

This next project is a wood frame I bought at my local craft store. This was unfinished wood and I painted it with white acrylic paint. Acrylic paint is great because it dries quite quickly. I put 3 coats of paint on it within an hours time. I created a quilt using two of the quilt blocks from the Quilter's Sampler stamp set. I stamped each block separately on Papertrey Ink's stamper's select white card stock. I colored the blocks with Marvy LePlume markers in two different shades of purple. These blocks have stitching on all sides but I cut the stitching off on some of the edges, lined them up to ensure the spacing and layout and then adhered them all on a piece of card stock. I then stamped the sentiment on a piece of Nicole crafts pastel card stock including a watermark image of one of the quilt blocks in the corner of the sentiment (it just looked too empty so I had to add something). I finished off the frame by covering the backdrop with some purple marbled fabric and then adhering the quilt and the sentiment. IRL it looks great on display.

Saturday, August 9, 2008

PC Pro Colorful Card Swap


I participated in a Paper Crafts Pro swap last month and the theme was to make a colorful card. After several days of pondering over my theme, this is what I finally came up with for the swappers. I die cut the candles using my Cuttlebug and a Sizzix die. I outlined the candles with a black marker and I also highlighted them with Stickles. Other supplies/tools used: Nicole Crafts card stock, DCWV card stock; Marvy giga scallop punch, patterned paper: My Mind's Eye; American Crafts ric rack ribbon, sentiment: Studio G stamp; ink: Black Brilliance.

Thursday, August 7, 2008

Another postage stamp card


I had fun making this card a few months ago that I made one last month for my sister's birthday. Quite a quick fun card to make!

Supplies/tools used:
Basic Grey criss cross fusion paper
SU card stock base
My Mind's Eye paper
American Crafts ribbon
HMA Creative stamp
SU ticket corner punch
Joann pastel embossing powder
Colorbox ink
Fiskars circle punch

Monday, August 4, 2008

Petal Surfing


I thought outside of the box and made this card a few weeks ago. This is a surfboard image from Inque Boutique's lil' surfer stamp set that I used to make flower petals. I stamped the image in black brilliance on white card stock and colored them with a brayer and rainbow ink pad. I created two layers of petals and adhered the top layer using pop dots. I stamped and cut out a mini flower also from the stamp set for the flower center. IRL the completed flower looked plain so I added stickles to bring it to life.

Friday, August 1, 2008

KSS Sneak Peek contest at Dee's StampincuzILuv2

Kitchen Sink Stamps sneak peeks have begun for their new stamp sets for August. Dee, one of the KSS designers, has a contest to win one of the new stamp sets. KSS has some great stamps, especially those 3 step ones; and I'd love to get my hands on some! Good Luck if you join in on the fun!

Thursday, July 24, 2008

KW's Color Inspiration 16


I participated in another of Kristina's color inspiration challenges. This was probably the most simplest card I ever made. I try not to stress over any challenge because it's supposed to be fun. So once I got the layout out in my mind, I just went with it. I embossed the card with the Cuttlebug swiss dots folder. I used the Cuttlebug flower die and DCWV card stock for the flowers and leaves and then I added a strip of Offray ribbon to the top of the card. For the scalloped edge, I used my Fiskars template to trace the scallops and then cut out the shape on both the front and back of the card.

Gina K SC123 challenge


These card sketch challenges are fun! It helps me improve on my card making skills and coming up with various color schemes and to try new techniques.

The card sketch is here at Gina's blog.


Stamps: Gina K Designs
Paper: My Mind's Eye (Magnolia)
Ink: Brilliance Graphite Black, Prismacolor pencils-orange, grass green, spanish orange
Accessories: brad-Making Memories

Friday, July 18, 2008

Latest cards


These are cards that I made in the last few weeks:

OCCC Basic Grey challenge - used Basic Grey paper, Stamps - Papertrey Ink message and ribbon, Martha Stewart zig zag punch.

4th of July card - Inque Boutique stamps, Morex bobbin ribbon

Sailboat card was for Julie's Color Concoction - Stamps: Papertrey Ink, Inkadinkado

Thursday, July 3, 2008

Color Challenge


I had a chance to participate in the color challenge here. This was very challenging trying to use all the colors but I'm happy to have complete this card.

Sunday, June 29, 2008

Sketch Challenge


I participated in another sketch challenge.

Making the card base look like a stamp was such a fun challenge. I quickly figured out how to do it; I first used the smallest circle punch I own but I thought the notches were too big so, I used my SU ticket corner punch. One mistake I did make was thinking I could get it right the first time (oops, I wasted a piece of card stock but I quickly made myself a template from scrap paper; whew; luckily I had another sheet of the same colored card stock). I stamped the flower image (Studio G) using Versamark on the pink card stock because I thought it was too plain. Anyway, I think it turned out quite nice, (gotta pat yourself on the back sometime, lol).

Paper: Brenda Walton
Card stock: SU
Stamps: Studio G (clear), HMA Creative (free gift with a British craft magazine)
Ribbon: Fine Lines

Friends


These two cards I made for the Gallery Idol challenge over at the Paper Crafts site. The theme was friendship.

Card 1 details:
Stamps: Inque Boutique (Lil flowers and Aging Gracefully sets)
Papers: Inque Boutique, My Mind's Eye
Other: DMC floss (used for hand stitching)

Card 2 details:
Stamps: Inkadinkado
Paper: My Mind's Eye
Ribbon: Michaels
Other: Martha Stewart doily edge punch and hydrangea punch; dimensional paint (for flower centers)

Gina K June challenge #2


This is a card I made for the Gina K challenge.

Papers: KI Memories, Masterpiece Studios
Ribbon: Sweet Petite

Little flowers


Stamp images are Inque Boutique (Create a flower and Happy Mother's Day sets). I watercolored the flowers using Crayola watercolors. Other items used: SU patterned papers and card stock, American Crafts ribbon.

Sunday, June 8, 2008

Paper Crafts gift bag


I used the Paper Crafts template to make this gift bag. I made this to hold a little bottle of perfume and some Hershey's nugget candy for the attendance secretary at my son's school. Whenever I had to call the school to report an absence or when my son had to turn in a note, etc., she was always so kind to both of us and when I spoke to her she said many compliments about my son. I made the tag by stamping the thank you message and using using an oval punch to cut it out. I also stamped the thank you message on the tissue paper (you can see parts of it in the picture). To make a nice presentation for the candy, I stamped some labels with flowers before adhering to each piece of candy.

Paper: Marcella K
Stamps: Studio G

3 presents


I like this card and I thought it was a fun layout so I created something similar.

For the mini presents, I used the dots image from the set called dotted flowers here in the 1st column 4th row ; stamped the 3 colors on white, used paper punch to cut out the squares, then I added ribbon to complete the look.

The birthday message image, I used markers to color in parts of it to match some of the paper colors.

Paper: Basic Grey

Friday, May 23, 2008

Sketch challenge


There was challenge to use a Gina K. Designs stamp.

This is my creation. It could have been better but I rushed to complete it to get it posted in time. I stamped image on water color paper and colored in with water brush using Crayola watercolor paints the night before, thank goodness, lol. Then when I was putting it together, I used x-acto knife to cut out image and adhered to black card stock. I adhered image to SU purple patterned paper and punched out black card stock circles to make my home made scallop edging. I inked up one flower in the stamp to make the flowered background on the white card stock base.

Tulips


I really liked this stamp and of course had to order it. I thought it was pretty cool that they were in a vase and also included a little note card for a message. I made these two cards with it. I used Marvy Le Plumme markers to color in the flowers. I also used SU patterned paper and Papertrey Ink stamps for the messages. I also added a little ribbon to complete the look.

Bear Hugs


I thought this image was so cute. It's a lil' stamp set by Inque Boutique. I also received their Cabana paper set a few days ago. I love the combination of colors in this set!! I used 3 coordinated colors from the pack. I used markers to outline the stamp image details and to color it in after stamping. I also used the versamark to stamp the words in the background; I didn't think it would show up too well in the photo but you can see it somewhat in the background on the orange paper. I used a scallop punch to cut the green paper to frame the bears. I embellished with brown ribbon but I also wanted to use a peachy/orange ribbon and I found a place to use it. I put a bow on the head of the large bear. I used the sizzix die to cut the bookplate to frame the words and finish it off with some brads on each end.

Thank You dots


I liked this yellow card here and it inspired me to make this card. It didn't come out the way I wanted it to but not too bad.

I made this a square card 5 1/2 x 5 1/2. Stamped flowers and leaves, embossed flowers and cut out all and adhered. Stamped dots and embossed then cut paper into strips. All images are Inque Boutique stamps.

Saturday, May 17, 2008

Mojo36 sketch


I liked the card here
so I decided to follow the sketch. I'm a little late but I'm happy to have completed a card using this sketch. I used Marcella K patterned paper I bought from Target. The stamped message and flower are Ink Boutique stamps, which I embossed. I covered the card base with pink DCWV card stock then some black card stock from my stash before adding the patterned paper, another layer of DCWV card stock and black sheer ribbon. I also added some faux stitching but I think I should have poked holes to make it look more like stitching. Well, hey, it was my first time doing this technique on a card, lol.

Friday, May 16, 2008

Ric Rack


I forgot that I never posted this card I made several weeks ago. This was a quick card. I stamped the flourish images and message using Inque Boutique stamps. I added the dark blue ric rack for some drama. The patterned paper is by Marcella K.

Friday, April 25, 2008

Papertrey Ink's April Blog Hop


I was selected as one of the participants for the April blog hop at Papertrey Ink. I decided to make two cards.

Card one, I used the paper snipets to make a bowtie as well as cutting down some squares to create the look of a cumberbund.

Card two, I found an image and basically paper pieced the suit jacket and tie, using the paper snipets for the tie and hankie in the pocket as well as cutting the squares in half for the corners of the card.

Thursday, April 24, 2008

2008 Mid-Atlantic Cake Show

The Mid-Atlantic Cake Show was last weekend and I wasn't motivated to make anything to enter into the Divisional Cake competition I guess since I haven't made a cake since last year. On Saturday, I did compete in a 1 hour competition in front of an audience (whoever wanted to sit and watch) and I think all seats were full but I didn't let that scare me, LOL, I just focused on what I was trying to do, LOL! It was about 7 or 8 of us, including two men, and we were provided with dummy cakes and we had to use Chocopan fondant and flowers that were provided by a few sponsors so I say "trying to do" because I had a few ideas but I didn't know what I was doing until I saw the flowers, so I basically just kinda winged it. I could have done better but I guess it's not too bad considering the time limit and it was my first time using Chocopan, a chocolate based fondant. I did start to have problems because it started to get soft and sticky but thankfully I managed to cover the cake dummy keeping the Chocopan in one piece. I thought for a second I would have to cut it into pieces and do a patchwork design but thank goodness that didn't have to happen, whew, LOL! I did find out that I wasn't the only one unsure of how they were going to decorate because during the competition when the emcee, Norman Davis, (he's been in several Food Network Cake Challenges, so if you watch these shows, you know who I'm talking about) asked if any of us were winging it and I think the majority of us was like, yes. So that made me feel better. What a challenge high! The cakes were put on display for people to vote for their favorite by adding money to the jars for that specific cake; the money is going to a Ronald McDonald charity. I didn't win but it was fun! On Sunday, I took 3 classes; figure and flower piping with Mike Terry, brush embroidery with Toba Garrett and whimisical cakes with Carrie Biggers.