Wednesday, November 23, 2011
My first crochet throw
Wednesday, November 9, 2011
Birthday Wishes

Sunday, October 30, 2011
Halloween Treat bag
This was a quick and easy treat bag I came up with for last minute gift giving. I decorated 18 of these wax paper bags and filled with some sweet treats and gave to coworkers. The haunted house and sentiment images are stamps that I purchased from Michaels.
Hope everyone has a safe and fun Halloween tomorrow!

Hope everyone has a safe and fun Halloween tomorrow!

Wednesday, October 12, 2011
Altered soft photo album
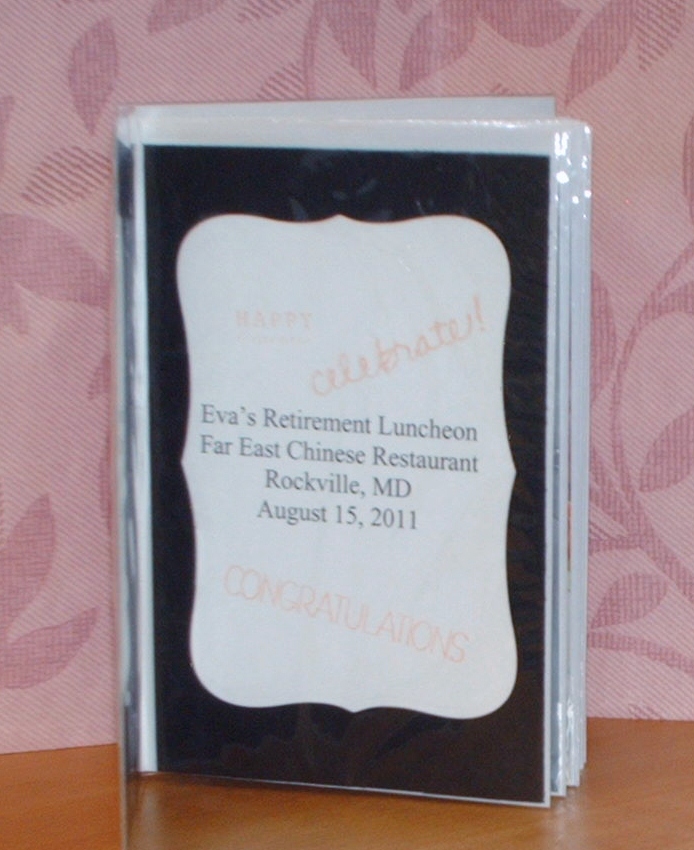
A few months ago, I attended a retirement party of a coworker who I had worked with for many years. I've been trying to take more photos lately so I brought along my camera. I took various pictures and decided to make a small memento of this happy occasion by presenting them to her in a photo album. I had approximately 20-25 photos so when I came across the soft bound photo album, I thought it was the perfect size plus it was great for altering! I wanted to present this album to her in person but I was on vacation during her last week of work so I had to mail it to her. I had written a nice note and slide into the back of the front cover opposite of the intro page of details. She contacted me after she received it and told me that she loved it! This was great to hear because she's such a sweet lady and I wanted to give her something special! Here are pictures of the front and back covers as well as the intro page with details of location, date, some stamped expressions of congrats, etc., to set the stage before the series of photos started! I can't remember where but I found the retirement quote online. I covered the front and back covers with some patterned paper. On the front cover, I also stamped her name in the top left corner using some script alphabet letter stamps. Roses are her favorite flowers so I used the rose from the stamp set A Year of Flowers by Gina K. Designs which I stamped on colored paper and hand cut before adhering with dimensional adhesive. The leaf sprigs were cut from a Sizzix die. I used Spellbinders' labels 8 die to cut the quote and black mat.


Wednesday, September 28, 2011
21st Birthday boxing glove card

 This is a boxing glove shaped card I made for my son's 21st birthday last month! He enjoys watching boxing, wrestling and UFC. I don't mind the wrestling but the boxing, ugh! But since 21 is a special milestone, his father and I got him tickets to a UFC event which will be in town this weekend! We learned of the show about a month before his birthday (perfect timing!) and I was so happy because I knew he had to receive a special gift to celebrate this milestone! Oh the smile he had on his face when he opened his card!!!!! Oh yeah, the card, lol! I drew out a glove shape on scrap paper and used it as a template to cut it from card stock. I found the boxing picture online and traced it onto tracing paper then onto card stock; this was the perfect embellishment for the card front! I stamped Birthday on a strip of white card stock adhered to the bottom and edged it with two black strips of card stock. For the interior, I stamped the sentiment on a white piece of card stock and attached it to create a pocket to hold the tickets. Both sentiments are from the Fiskars stamp set called Birthday Cheer.
Tuesday, September 6, 2011
Shabby Blessings card
The current JustRite challenge #057 is to create a shabby chic project. I usually make clean and simple projects so I thought it would be a good time to get out of my comfort zone.
 I started with a card base using SU's baja breeze card stock. The sentiment and image are from JustRite's The Greatest Joy stamp set. The sentiment is stamped in SU's old olive ink. I stamped the floral image using SU's chocolate chip ink. I colored it with Marvy LePlume II markers, SU's So Saffron ink, a water brush and I also added a little shading on the ribbon with a Copic marker Y15. I cut the image out using using Spellbinders oval nestabilities. I used the Sew Easy stitch piercer tool to add holes and I hand sewed a border using DMC floss #3822 around the perimeter of the patterned paper. Both patterned papers are by My Mind's Eye and the floral image is matted on SU's old olive card stock. And to add some shabbiness, I used the Tim Holtz distressing tool to distress the edges of the sentiment and image. I enhanced the torn edges with tea dye distress ink as well as the strip of lace. Finally I added some pearls, mini rose and ribbon bow to finish off the card.

Saturday, August 27, 2011
Make a Wish

Thursday, July 7, 2011
TMNT pillow form cover
 | |
| pillow front |
 | |
| pillow back |
Tuesday, July 5, 2011
Square bottom bag

Sunday, June 5, 2011
Adventures in sewing
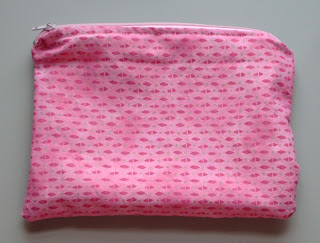
Ever since I took a sewing class over 5 years ago, I've been buying fabric and have accumulated a good stash! In that class, I made the black bag below. I'm so proud of it and carry it to work everyday! Of course after this class, I was like, I'm going to buy a sewing machine and make more of these bags! Well, I did buy a sewing machine but I haven't made another of these bags yet. This ever happen to you with a project? LOL! But, I have been getting some use out of the sewing machine, thank goodness! I've made an apron and a few pillowcases. The pillowcases are really fun! A couple of years ago, the local fabric store had a sewing event where individuals were provided fabric and taught how to sew a pillowcase and then the pillowcases were donated to a charity. When I wanted to make one for my son (finished pic below) I had to do a search on YouTube because I forgot a few steps and thankfully I found a few videos using the same technique taught at the fabric store. This is the video I like best (and they have some other great videos too!) http://www.youtube.com/watch?v=MrYWCma9wgM . But most recently, I made a zippered case and a mini four patch bag which didn't turn out too bad. I'm keeping the projects small for now but hope to work my way up to a larger project such as a quilt. Happy Crafting!


Craft Fair
Back in April, I participated in a 4 hour craft fair at an elementary school. I have a variety of projects just sitting around, so I thought I'd try to my hand at selling. I was a bit nervous at first but I felt at ease after the first hour! There weren't too many customers (I'll blame it on the beautiful Spring weather that day! :) but I did make a few sales! I sold 3 cards, 2 beaded pens, 1 bracelet and 1 post-it-note w/mini beaded pen packaged gift! I also met a few other crafty people and I learned of an art group in the area. Here are some pictures of my setup.


Thanks So Much

The sentiment is from the Thanks with Style stamp set by Kitchen Sink Stamps. I used Stampin Up's blush blossom cardstock and ink.
Wednesday, February 16, 2011
JustRite Friday challenge 048

Monday, January 31, 2011
Bundle of Joy
Happy New Year all! Hope everyone had a nice holiday!
For the past several years I always plan to create more scrapbook pages to get those photos out of boxes. It was perfect timing this year because JustRite Stampers introduced some new stamps recently and I just had to get The Greatest Joy Borders and Centers stamp set. The sentiment in this stamp set fit perfectly for this layout I created. The photos are from 1990 when my son was born but hey, it's better late than never, LOL! Other supplies I used: patterned paper by Frances Meyer, ballet blue ink by Stampin Up, alphabet tiles from Hot Off the Press' for Boys to Men scrapper's paper pack, Spellbinder's oval dies and heart paper punch.

For the past several years I always plan to create more scrapbook pages to get those photos out of boxes. It was perfect timing this year because JustRite Stampers introduced some new stamps recently and I just had to get The Greatest Joy Borders and Centers stamp set. The sentiment in this stamp set fit perfectly for this layout I created. The photos are from 1990 when my son was born but hey, it's better late than never, LOL! Other supplies I used: patterned paper by Frances Meyer, ballet blue ink by Stampin Up, alphabet tiles from Hot Off the Press' for Boys to Men scrapper's paper pack, Spellbinder's oval dies and heart paper punch.

Subscribe to:
Posts (Atom)