Sugar and Paper
Sunday, February 8, 2015
New Year, new blog
With the start of a new year, I have decided to start a new blog. If you're interested in my craft happenings, information can be found at Bouquet of Crafts! Thanks!
Sunday, October 12, 2014
project - Online Card Class Day 8
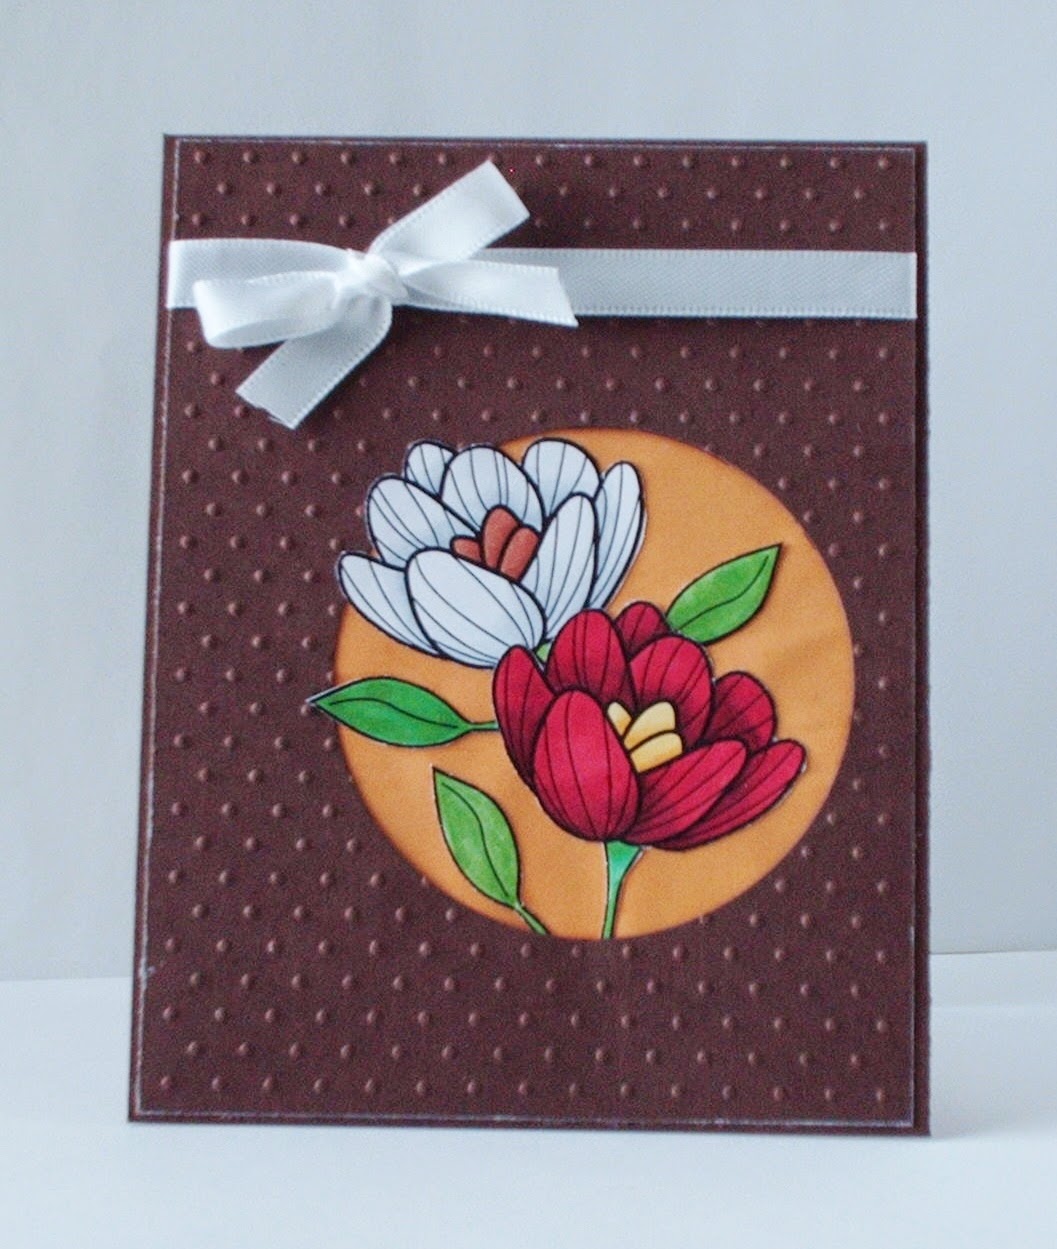
Now that the basics have been taught, the Online Card Classes Copic Markers for Card Makers, day 8, is to incorporate practice images into a card. I was inspired by Sandy's "Beautiful" card and decided to use a few of the flowers that I colored. The card base is dark chocolate card stock by Papertrey Ink. The added front panel layer, also with the same card stock, was dry embossed with swiss dots, swiped with white ink along the edges and top wrapped with a ribbon and bow. I also decorated the interior to show off a full bloom and to also add a panel for writing.
Saturday, October 11, 2014
Online card classes Day 7
The topic for day 7 of the Online Card Classes Copic Markers for Card Makers was coloring with difficult colors. The colors used in the lesson were red, white and black. The images for the lesson was a flower and robot vampire and bat. I have a Copic R29 which is the only red I own in the R2 color family. On the first flower, I combined R29 with R85 which looks a bit of a pinkish red and R89 which is more of a deeper maroon color. I put down a base color of R85 and then R89 for the shaded area. To try to make the petals red, I tried the tip to tip technique to blend the R89 with the R29. Because of the different intensity of these colors, it didn't quite work although not too bad but I do need to practice the technique more to get better blending. The second flower I used R29 and R89 and it looks fairly good. The third and fourth flowers I colored with C1, C3 (cool gray colors) and a bit of the colorless blender to create a white flowers. It may be hard to see in the photo but the difference can be seen in person. Also, the lesson included a robot vampire and bat image. The instructor used darker grays and black for the cape but I only have the C1 and C3 so I experimented with what I had and used the R89 for the interior and black on the exterior. I like the look. I also tried to give the cape on the second robot a pleated look similar to what the instructor demonstrated. Again, I didn't have any darker grays so I used the R89 for the pleat. And for the bats, I used the grays and outlined them with the black. However, on the first bat, I tried to incorporate some black into the wing by trying the tip to tip technique with the C3 and the black and also the colorless blender and black. Well, if I had worked on it more, I might have gotten the wings a little more color. But overall, it wasn't too bad practicing with these colors. Below is my practice sheet.
Thursday, October 9, 2014
Online Card Classes day 6
Using the colorless blender, coloring animals and adding texture were the topics for Day 6 of the Online Card Classes Copic Markers for Card Makers . On the first dog, I did some basic coloring and added some spots. For the second dog, I used the colorless blender to create texture by dabbing the marker over various parts of the image which created the white spots. The coloring of the orange dog was basic however I used the colorless blender to fade the color down into the white areas. And on the fox image, I did my best at trying to make long fur but I need to practice getting thinner strokes to make finer lines. A picture of the practice sheet of colored images is below.
Online Card Classes practice day 5
The lesson for day 5 of the Online Card Classes Copic Markers for Card Makers was about coloring hair, skin and clothing. It was fun learning various techniques from the teachers but it will sure take some practice. Coloring the hair was a bit rough but with more practice I should get better with the shading and highlights. The skin coloring wasn't bad at all and it was fun coloring the cute ballerina image! Below are the pictures of my colored images for this lesson.
Sunday, October 5, 2014
Online Card Classes practice day 4
For day 4 of the Online Card Classes Copic Markers for Card Makers, the lesson was about lighting and how to shade an image depending on the direction of the light source. Lighting and shading is not something I have given much thought to when it comes to coloring but it can add some dimension to an image. The lovely floral image for this lesson was fun to color. As you can see on my practice sheet below, I used various colors on the flowers. For the top two images, I envisioned my light source was coming from the top left, trying to keep the lighter color on the left side. On the bottom two flowers, I decided that the light was beaming straight onto the flowers. Also, to color the petals, I used a flicking technique as shown in the lesson, to add the appearance of texture. The lighting and shading concept is something that will definitely take some practice but as long as the image looks good to you, there's no need to stress over it. Have fun coloring!
Online Card Classes practice day 3
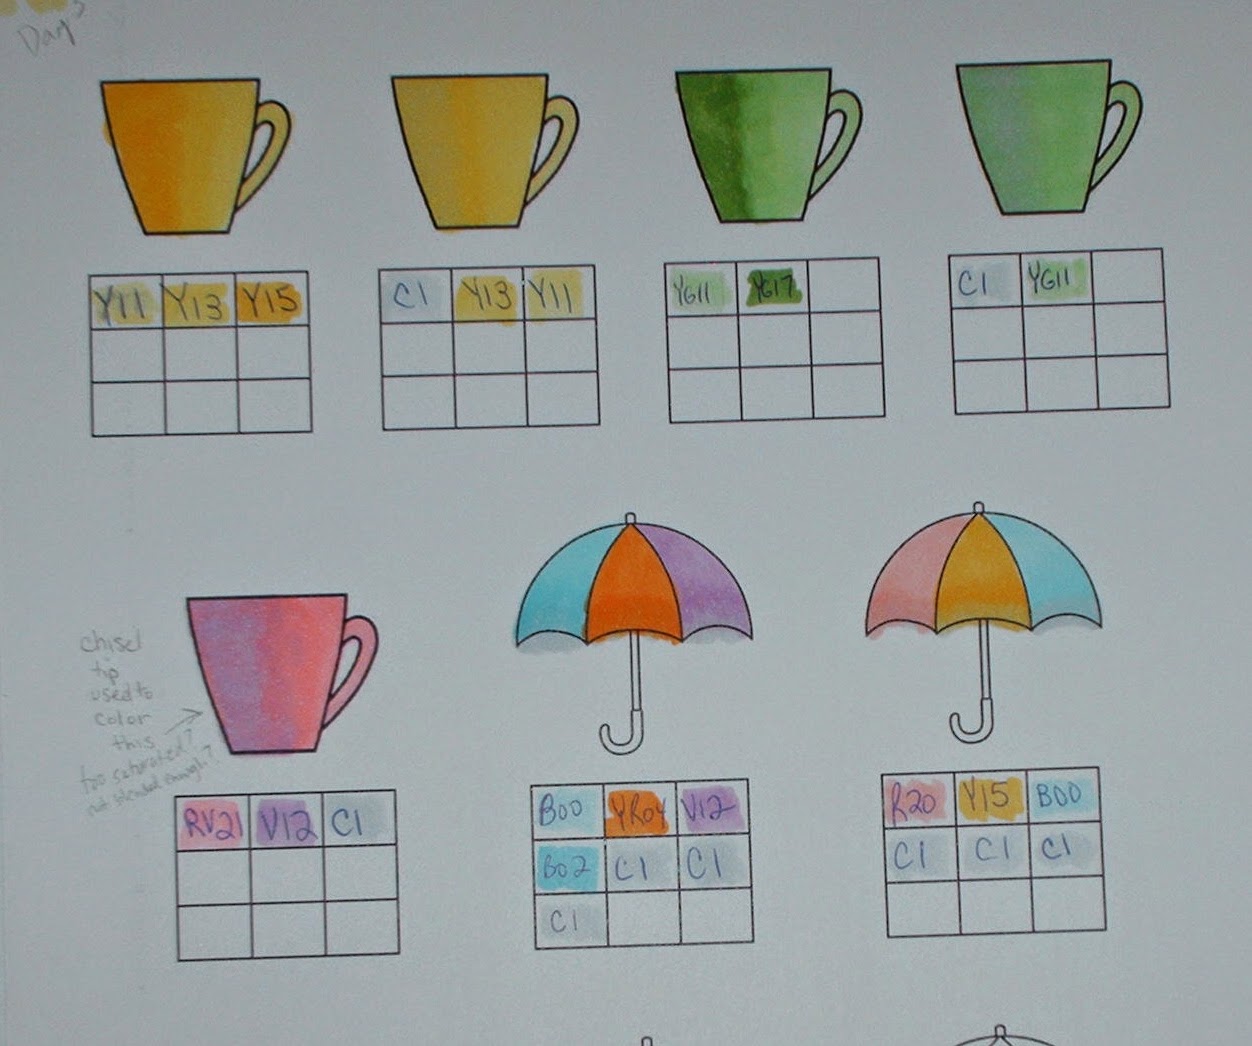
For day 3 of the Online Card Classes Copic Markers for Card Makers,
the lesson was about shading with a gray marker. I only have a C1 marker so the technique worked good for me when I used one light color to shade with it. This is shown on the second umbrella on my practice
sheet in which I used R20, Y15 and B00.
Subscribe to:
Comments (Atom)


